We are very happy to announce an updated version of the Qt Automotive Suite, a unified HMI toolchain and framework for digital cockpit, is now available.
In case you hear about this for the first time, Qt Automotive Suite was created together with KDAB and Luxoft to solve the key challenges in HMI creation for digital cockpits in automobiles. With combinations of world class tooling, automotive specific software components, and highly optimized software framework for embedded devices, we are solving those challenges and offering the world’s end-to-end HMI solution with a single technology.
In Qt Automotive Suite 5.11 we have a major upgrade for the 3D tooling, complete overhaul of our reference UI and improvements on automotive components. All of these are built on top of Qt 5.11 series, bringing the cutting edge of what Qt Automotive Suite offers.
Faster, better, stronger
For those of you who are already familiar with Qt Automotive Suite releases, you might have noticed immediately that we no longer maintain its own version number. Good catch! Since the release of Qt Automotive Suite 2.0 this year, we decided to make new releases following Qt’s release schedule. That way, every Qt Automotive Suite future release can benefit new features and improvements from each Qt release, and more importantly we can now make new releases more frequent.
With mere four months time between Automotive Suite 2.0 and 5.11 releases, we are very pleased to see more OEMs and Tier1s took interest, and quite a few of them adopted it for developing their next generation digital cockpit platforms. Once again proving that OEMs and Tier1s would like to consolidate into one technology for the entire digital cockpit HMI development.
What’s new?
So, what is in Qt Automotive Suite 5.11? The most visible part of the new release is the new reference UI. The reference UI is not a showcase for the capabilities but actually a starting point for iterative development either in the UI or underlying functionality.

Figure 1. Neptune Reference UI
Qt Automotive Suite 5.11 comes with a major overhaul of Neptune Reference UI and a new User Experience design. There are now three parts in this Reference UI: an instrument cluster, an IVI, and a mobile app for remote control. It forms the minimum building blocks for the digital cockpit HMI where the instrument cluster is for the driver, in-vehicle infotainment is for the driver or passenger, and a mobile app that the driver or passenger can custom their favorite settings remotely.
So how Automotive Suite was used to build the Neptune UI? You will find more detail in the “Neptune Reference UI in depth” section. Let’s look at Automotive Suite architecture.

Figure 2. Qt Automotive Suite Architecture
In summary, the above diagram reflects our vision to provide easy-to-use tools that free designers and software engineers to rapidly create superior digital cockpits.
Qt for Device Creation 5.11
Of course, Qt Automotive Suite 5.11 sits on top of Qt 5.11, bringing major performance improvement and new feature set.
Qt 3D Studio 2.0
We believe a truly unified HMI toolchain and framework should also ship with advanced UI authoring tool for the designers. With 3D becoming a more significant part of the HMI we saw the need for a design tool that facilitates rapid 3D UI/UX concepting and design. With Qt 3D Studio 2.0, we have now all new 3D rendering engine and a great number of improvement on the usability and features. Have a read at Qt 3D Studio 2.0 blog.
Check out our latest cluster demo (codename Altair) implemented by 3D Studio 2.0.
Qt Safe Renderer 1.0
Functional safety is a critical path that our customers must cross. Qt Automotive Suite 5.11 includes the Qt Safe Renderer, which is now certified by ISO 26262 part 6 up to ASIL-D specification. If you missed the announcement, be sure to check out here.
Qt Application Manager
Qt Application Manager brings a modern multi-process GUI architecture to the IVI. By separating the HMI into different functional units (for example, HVAC could be one unit while Navigation could be another), Qt Application Manager enables independent teams to develop and test both separately and simultaneously, thereby reducing project risk and shortening development time. In addition, splitting the UI into smaller applications also makes it easier to do system updates; smaller pieces of code are touched, and the OTA updates are smaller. To learn about Qt Application Manager, check out the documentation at: https://doc.qt.io/QtApplicationManager/index.html
With Qt Automotive Suite 5.11, Application Manager has received updates highlighted as follow:
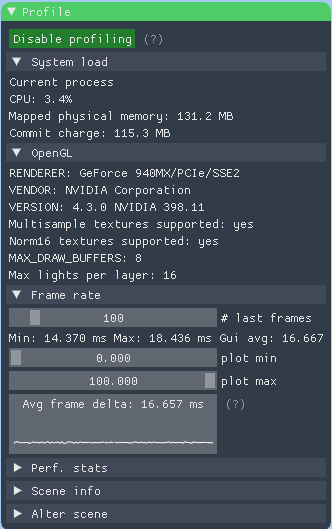
- Improved performance monitoring and profiling API that now supports GPU utilization.
- QtObject can be the root element of an app or a System UI, thus improving the multi-window support.
- We’ve also added support of OpenSSL 1.1 as required in Qt 5.11
- There is now support for extra meta-data in application packages, which enables new features in future releases of the Deployment Server (previously known as “App Store Server”).
Qt Application Manager Plugin for Qt Creator
Since Qt Application Manager controls the application lifecycle, a direct launching from Qt Creator is not possible. A special plugin is provided now which wraps the command line tools provided in Qt Application Manager and integrates all essential steps into Qt Creator IDE. In Qt Automotive Suite 5.11, we have improved our documentation and the plugin stability.
Qt IVI
To tackle reusability, QtIVI brings a level of standardization within the Qt ecosystem for how to access and extend automotive-specific APIs. The applications developed in one generation of a program can be reused on the next, even if the underlying platform is different. This is particularly important as OEMs are increasingly taking control of the car HMI development, reducing duplication of work means significant cost saving and more focus on brand UX differentiation. Qt Automotive Suite is designed to integrate well with industry’s leading initiatives such as GENIVI and AGL, further increasing the reusability on the platform level for the entire industry. More detail can be found here.
With Qt Automotive Suite 5.11, Qt IVI has received updates highlighted as follow:
- In Qt Automotive Suite 2.0, we introduced the use of IVI APIs auto-generated from IDL files written in QFace. In 5.11, it also can also use QtRemoteObjects as an IPC provider. The latter allows further modularization of the IVI middleware across multiple processes with clear benefits in stability and a cleaner architecture.
- To make it easier to write and maintain the templates for the “ivigenerator”, a common template folder has been introduced. With this change we also introduced common Jinja macros, which removes a lot of common boiler-plate code in our macros.
- The “ivigenerator” now also supports additional annotation files. This can be useful if multiple parts are generated from the same QFace file, whereas every project needs different annotations.
- A new “QIviPendingReply” class was introduced. This class is a QFuture/Promise like API which can be used from C++ as well as from QML and is used to provide the return value of a function in an asynchronous manner. This is already fully integrated into the new QtRemoteObject based generator templates.
Comprehensive documentation
Without exception, we continuously improve our documentation. Qt Automotive Suite 5.11 comes with more comprehensive documentation and examples for most of development needs.
Summary
With Qt Automotive Suite 5.11, we have further strengthened our offering for the truly end-to-end solution for the digital cockpit HMI development. We brought in all new Qt 3D Studio 2.0 with many of the needed changes for automotive HMI designers, we added the fully certified Qt Safe Renderer for addressing the functional safety. We revamped the Neptune Reference UI that provides modern reference to digital cockpit design, and showcased how easy is to build digital cockpit with Qt Automotive Suit. We made significant number of improvements on all our software components. Finally, many thanks for the feedback especially from our customers and prospects.
Neptune Reference UI in depth
IVI
To highlight the multi-process UI capability of our Qt Application Manager, we redesigned the System UI with a strong focus on what’s possible with multi-process UI paradigm

Figure 3. Neptune IVI with focus on multi-process UI
As depicted by the figure above, we now introduced a new concept of “App Widgets” shown on the System UI, while each app widget runs in its own process implemented in Qt Application Manager. User can freely move each app up and down, open or close the app. When you resize the app window, the app will automatically display the right content based on window size, thus addressing the popular trend called Response UI.
We have added theming and accent color to the IVI settings, so a user can select dark and light theme with multiple accent colors, thus provides reference to how Qt Automotive Suite enables theming capability.

Figure 4. Theming and color accent
For navigation and mapping, we now leverage the Qt Location Mapbox GL Plugin, which provides the Mapbox mapping and styling by following Neptune UI theme and styles.

Figure 5. Mapbox GL plugin from Qt Location
The Vehicle application now contains an interactive 3D car model and adds controls visualizing user actions via manipulations of 3D objects via QML API. All this is completely based on Qt3D and so demonstrates that no additional software is required to visualize 3D objects in automotive use cases.

Figure 6. 3D car model and seamless integration with QML control
Instrument cluster
On the instrument cluster side, user can now share the content shown on the IVI onto the instrument cluster screen. Also, Qt Safe Renderer has been used to render the tell-tales as separate process via RTOS and hypervisor.

Figure 7. instrument cluster gets the Mapbox view shared by IVI
Inter-domain and inter-process communication
To cater the need for inter-process and inter-domain communication, we implemented a new Remote Settings Server based on Qt Remote Objects, which can serve multiple clients running on the same host or remote instances. For example, our new mobile app called “NeptuneControlApp” is capable of running on a mobile device. The app can communicate to the Remote Settings Server, and user can for instance change the language of the digital cockpit as well as many other settings that are accessible. Perhaps the best part of the app is that it shares the auto-generated code base with Neptune UI and the Setting Server, thus matching to exposed setting options without manual work.

Figure 8. Remote Control App for Android and iOS
Check out the documentation at: https://doc.qt.io/Neptune3UI/index.html.
The post Introducing Qt Automotive Suite 5.11 appeared first on Qt Blog.


 There has been a lot of back and forth around the use of Free Software in public administration. One of the latest initiatives in this area was started by the Free Software Foundation Europe,
  KDAB was sponsor of this annual C++ event run by the
  A medical client’s showcase presentation – Qi Tissue using Qt 3D and taking the hunt for a cure for cancer to new levels.


 Around 200 people showed up for “++ it”, 50 more than last year, and were treated to an excellent program.